Lesson 14 - Using Maya's Copy and Paste keys tool
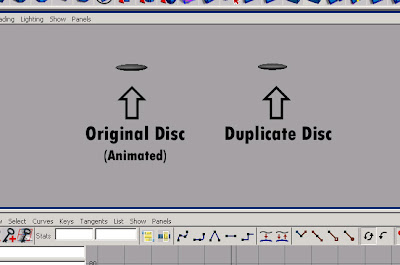
There are
two disc on our stage and..
one is
animated (
Original Disc) and another one is
non-animated (
Duplicate Disc),
we basically going to
copy and
paste the
same animation to the
another disc.
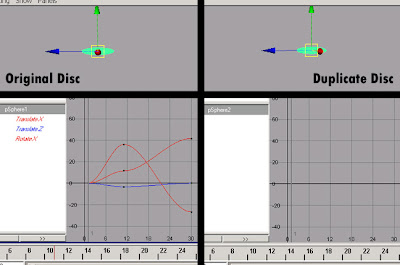
You can see the Graph of the
Original Disc and the
Duplicate Disc.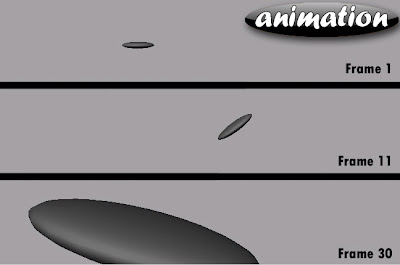 Movement
 of the Disc.
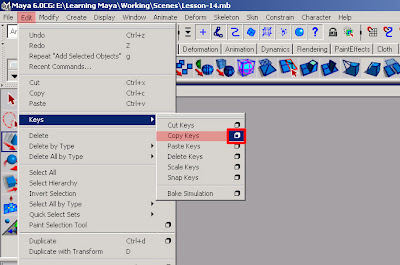
Go to
Edit >
Keys >
Copy Keys (
Option Box)
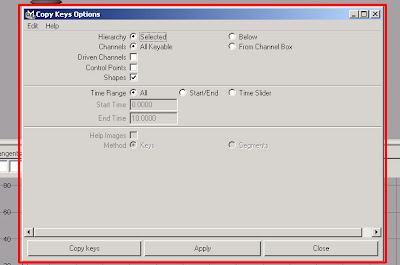
The '
Copy Keys Options' window
or
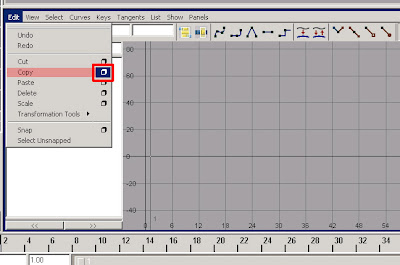
Go to '
Edit' in the Graph Editor and '
Copy' (
Option Box)
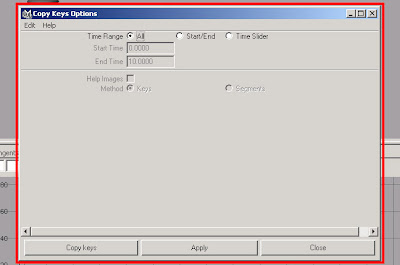
'
Copy Keys Options' window, Which shows only the copy option.
 Time range:
 - All: It will select all of the keys copyed, or whatever we have selected.
- Start/End: This will indicate which frames we would like to copy and paste.
Time Slider: Whatever our range slider set to.
- Help image: It basically tells us what our method do for us.
 Help Image:
- Keys: Copy and paste the keys.
- Segments: Its not only copy and paste keys, but it also set keys on our range whatever indicated from either 'Time Slider' or 'Start/End' time.
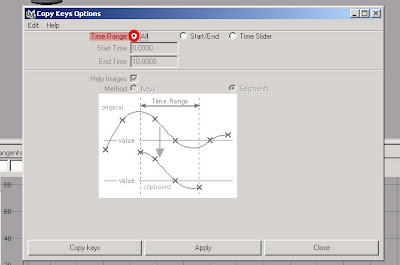
we are going to work on '
All'. So lets select that.
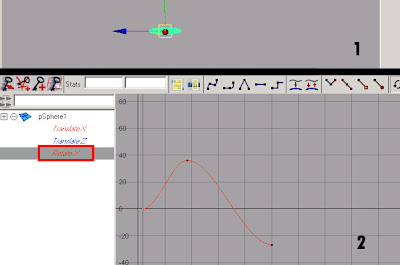
Select our
Disc, and we will focus on one attribute and here, lets take '
Rotate X'.
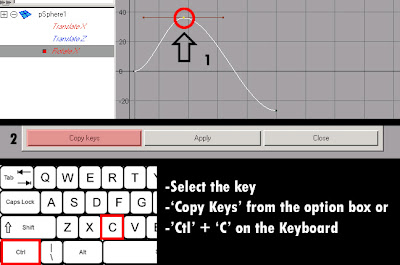
Select the key, and '
Copy Keys' from the '
Copy Keys Options' window, or '
Ctl' + '
C' to copy the key.
Once we copy the keys it will stored into our Clipboard.
or
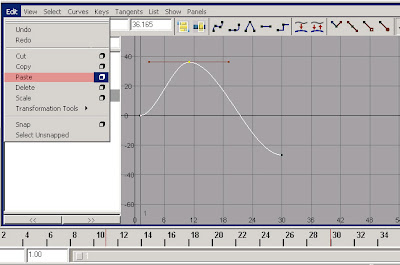
Go to '
Edit' in the
Graph editor and select '
Paste' (
option box)
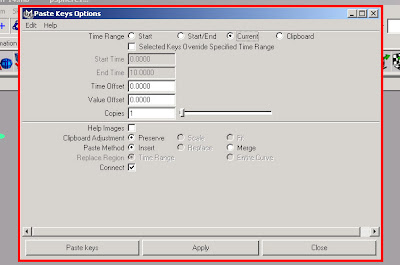
'
Paste Keys Option' Window, which shows only the 'paste options'.
 Time range:
- Start: Based on our timerange we can paste from our start time.
- Start/End: Start and end time
- Current: Our Current frame.
- Clipboard: From the Clipboard
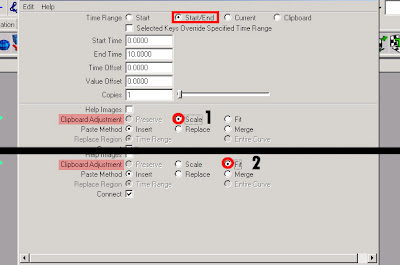
From the
Start/End time notice below from the clipboard two
catogeries are visible.
- Scale: It indicates that if we were to set the Start and End time the keys that we copy will fit with a scale within the range.
- Fit: It allows to have the keys fit within the range without any scale.
 Current:
 Whatever current frame that we have marked.
- Copies: We can copy and paste keys on the timeline, whatever value we have indicated in the 'Value Offset' box and 'Time Offset' box, when we increase the numbers of Copies within our paste option.
 Clipboard:
 - Preserve: So this allows us to preserve whatever we have within out clipboard. Its going to take the vaule and paste it right where we indicated.
 Paste Method:
- Insert: Insert our keys before, whatever we have specified in our value.
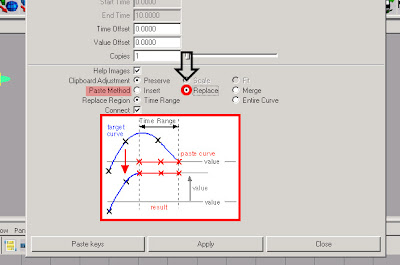
- Replace: It takes all of those keys, lets say we had a range and any keys within that range is going to be replaced.
- Merge: Its going to merge the keys.
We are going to use 'Replace' here, and turn off the 'Connect'.
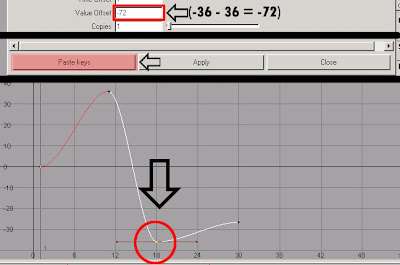
We do need to indicate 'Time offset', 'Value offset', so we can get the swing is what we are looking for.
 VERY IMPORTANT
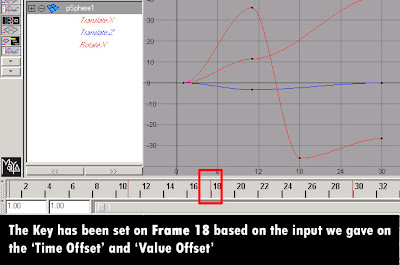
- Time offset: We want the time offset to be offset from whatever key we have selected to copy, so here is 'Frame 11'. so '0' would indicate the position of our selected key.
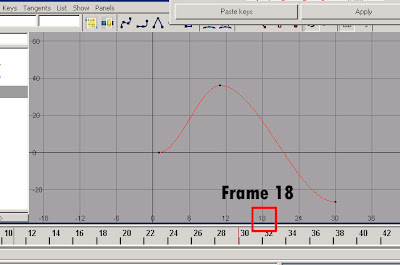
now if we wanted to paste it....Lets say
Frame 18, so what time we have to put on our '
Time offset' to move the key to
frame 34..?
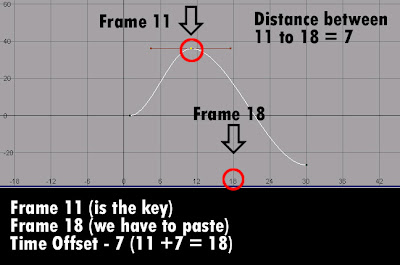
The
original frame '
Frame 11'
The
place we are going to
paste is '
Frame 18'
The
distance between
11 and
18 is
7Time Offset is
7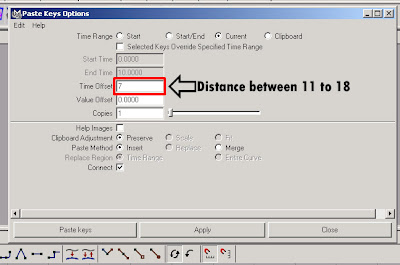
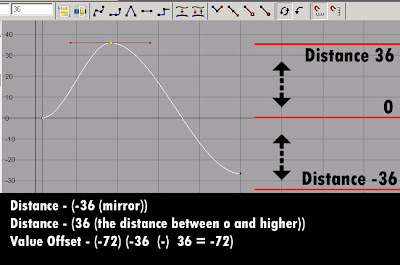
Whatever value we would like the
Key to be act.
so in this case we want the
Mirror Effect, right now our
value is set to
36, If we want the key to have a
mirror of
Negative 36(-36), we would need to not only put in
-36 into our window, but also we would need to put one more time to get the
mirror effect.
So its basically saying if we do
negative 36 once thats gonna brings us to '
0',
negative 36 (-36) again thats gonna bring us to the number of 36 (
which is in the value box)
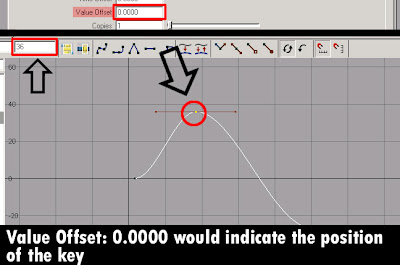
On the
value offset.