Showing posts with label Learning Maya. Show all posts

Saturday, June 7, 2008

Lesson 25 - Cycling animation in Maya for efficiency (Part 1)


Select the main control, you can even apply to individual attributes and increase the frames in the timeline for cycling.


Pre Infinity: Which allows to cycle before and
Post Infinity: which allows to cycle after

go to curves > Post Infinity > Cycle


Hit 'play', Notice the animation its repeating the action throughout an unlimited amount of time

If we have to see visually what happens in the Graph editor then..


Go to View > Infinity

Notice we are able to see our interpolation throughout an unlimited amount of time.


Go to Curves > Pre Infinity > Cycle.


Notice we are getting the cycle before '0'(zero), Its on our Negative value.


Go to Curves > Post Infinity > Cycle with Offset.


Notice the curves, they moves continuously through out times, When you play, the animation moves continuously.

What it does here is, It takes the Start key and places it right were our End key. and then it attaches to our curves so we can get nice motion throughout.

Ex: Walk cycle


Go to Curves > Post Infinity > Oscillate.


Notice it oscillate our cylinder through time, so its just essentially going forward and backward

Ex: Fan (oscillating).


When you are working with cycles, make sure all your start and end frames are in the same line. if it does'nt i'll go in a offset value.
Lesson 24 - Ghosting Animation Sequences


The Animation.


Select the Object (Cylinder), Go to Animate > Ghost Selected (Option Box).


'Ghost Options' Box.


The Default value is set to 'Global Preferences' and hit 'APPLY'.


What we see here is a multiple cylinders in our view port, only our main cylinder is able to select. The others are the visual representation of our timing.


Custom Frames: It allows to set the custom amount of frames which we like to ghost.


We don't have any Cylinders following us but we do have some on frame 1, 10, and 20 what we specified from our option, it doesn't move along with the main cylinder if you 'play'.

The Result.


Custom Frame Steps: Its basically the same as the 'Global Preferences', Only with this we can customise and tell how many cylinders we like to see as well as its spacing per frame.


The Result.


Custom Key Steps: It does the same thing as 'Custom frame steps' except we are able to see per key.


Keyframes:
Frame Range: which allows us to adjust from our Timeslider and start and end time.


Notice we are able to see all of our keys from the frames on our timeslider.

and the same way start/end time works.

Lets go back to 'Custom Frame steps'..


Hierarchy: It ghost not only the selected object but the object within our hierarchy, so the children object, and underneath we can specify what 'Object type' we would like Geometry,Locator,Joint,All other types.


now lets say we want to unghost.
First select our Object, go to Animate > Unghost Selected (Option Box).


'Unghost Options' Box.


Notice by default the Hierarchy is set to 'OFF', now turn it 'ON' and click 'APPLY', Notice the ghost objects are gone.

Thursday, June 5, 2008

Lesson 22 - Proportionally move keys frames along the Timeline using set breakdown


Select the F-curve and select the first half and move and select the last portion and move, but how do we move proportionally? we want it more accurate, how do we do that?

The tool is called 'Set Breakdown'.

Lets focus on Translate Z here and we can set a breakdown on our translate Z, so that we can speedup the animation proportionally alltogether.

so we don't have to move each and every key manually.


Go to Animate > Set Breakdown (Option box).


Set Breakdown Options.


To Set breakdown on All Keyable attributes From Channel box

Select the translate Z on the Channel box (2) and move your slider on the timeline to Frame 19th Key (4) (where you want to convert the key into Breakdown).


Click 'Set Breakdown' in the Option box.

Notice the key color and the bar on the timeline both turns 'Green', this tells us we have a Breakdown key set on this frame for this key.


If we select the keys after the breakdown and drag it, even thou we haven't selected the breakdown we can still able to move it proportionally.

NOTE: The breakdown key only moves from its assiociate key, means we can only move it from whatever key we have applied, or the attribute.


If we want to Change the Breakdown in to the original Key, then go to the time line (the breakdown key is on frame 19) Select it by holding the Shift on your keyboard and click and drag to get the red box.

Right click on that and set it to Keys > Convert to Key.

or


Still selecting the Breakdown on our timeline Go to Keys > Convert to Key in the Graph Editor menu.

and Notice the Breakdown key turns into a Regular Key (You can see the change in color).
Lesson 18 - Modifying tangent handles for fine-tuning animation


Select the image and go to Graph Editor.


Lets focus on one attribute(Translate Y) (a), and notice a flat line on the graph(b) we don't really want the animation to go on one line instead we want some kind of arc. so here we can use the tangent handle to get a nice arc movement.


select your keys to bring the tangent handle.

NOTE: you can not move your Tangent handles if the 'stepped' interpolation is selected, it works for other options in the 'Tangents' menu.


Select one half of the tangent handle, Select the 'Move tool' and 'middle mouse' button and drag up, select the other side and do the same.

Now you can see the Difference in the Animation.


Thursday, May 8, 2008

Lesson 16 - Adjusting how our function Curves (F-curves) interpolate


The animation.


The Graph Editor.


Go to Tangents in Graph Editor and we will discuss

Spline, Linear, Clapped, Stepped, Flat, Fixed.


  • Spline: It will give you a smother Interpolation through out our whole entire 'F' Curve.
You can Use Spline to animating more Organic Biped and Quadrupeds types of characters.


  • Linear: Its good for working Mechanical type animation, you can get more mechanical type of movement, and it also great for animating eye movement.

  • Clamped: If you see Clamped almost looks like Spline, What clamp does is it basically gives us the spline result. But the keys are nearer to each other it gives the more of a linear type of result for tanents.
Clamp is the Default in and out tangent's of Maya, you can start of your animation with it, but you can adjust it later.


  • Stepped: It gives more of a Step type of interpolation, the animation will be more Blocky.

Its gives the Pose to Pose method in animation.

  • Flat: It gives Pauses wherever there are inbetweens keys, Its very useful in working on Ease In and Ease out and moving hold.


  • Fixed: It Allows us to Keep the Tangent handle Fixed into its position.

Lets say we focus on 'Rotate X' and increase the frame to 150 and notice our value has changed, but our tangent handle is NOT. Because of our selection (FIXED) that we have made so thats essentially what it does, it locks the tangent handle.


  • In Tangents/Out Tangents: First part of the tangent handle is 'Linear', and the second part of the tangent hand 'Spline'.

Wednesday, May 7, 2008

Lesson 14 - Using Maya's Copy and Paste keys tool
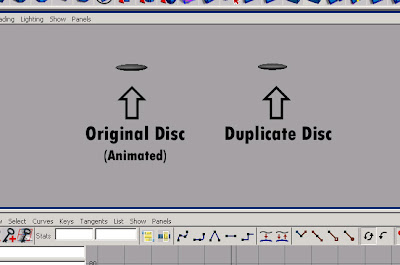


There are two disc on our stage and..
one is animated (Original Disc) and another one is non-animated (Duplicate Disc),
we basically going to copy and paste the same animation to the another disc.
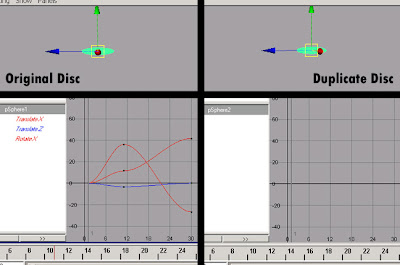


You can see the Graph of the Original Disc and the Duplicate Disc.
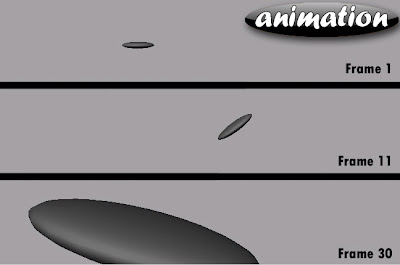


Movement of the Disc.


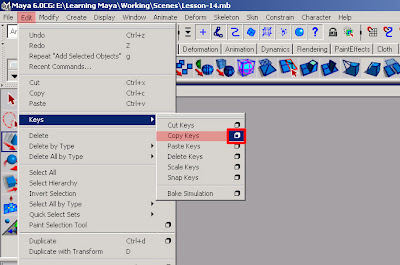
Go to Edit > Keys > Copy Keys (Option Box)


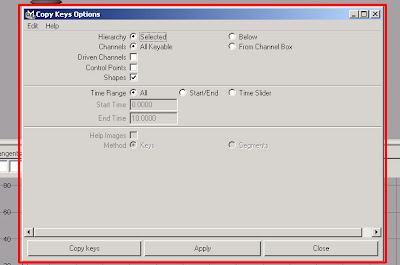
The 'Copy Keys Options' window

or


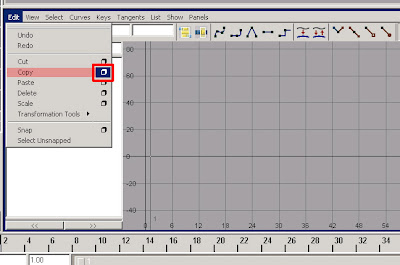
Go to 'Edit' in the Graph Editor and 'Copy' (Option Box)


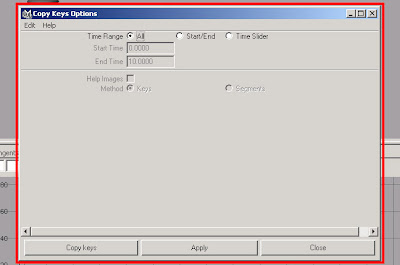
'Copy Keys Options' window, Which shows only the copy option.


Time range:
  1. All: It will select all of the keys copyed, or whatever we have selected.
  2. Start/End: This will indicate which frames we would like to copy and paste.

Time Slider: Whatever our range slider set to.

  1. Help image: It basically tells us what our method do for us.


Help Image:
  • Methods:
  1. Keys: Copy and paste the keys.
  2. Segments: Its not only copy and paste keys, but it also set keys on our range whatever indicated from either 'Time Slider' or 'Start/End' time.
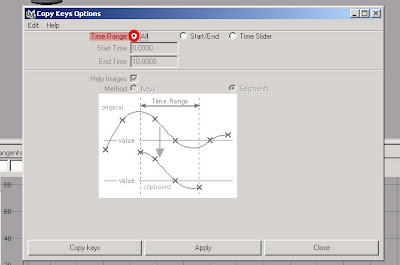


we are going to work on 'All'. So lets select that.


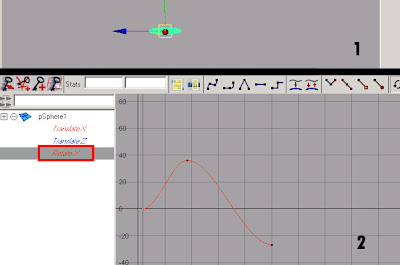
Select our Disc, and we will focus on one attribute and here, lets take 'Rotate X'.


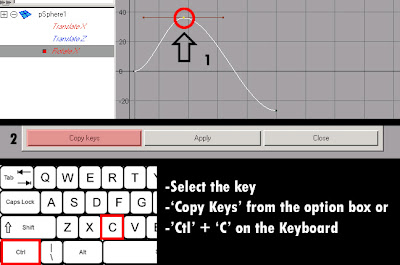
Select the key, and 'Copy Keys' from the 'Copy Keys Options' window, or 'Ctl' + 'C' to copy the key.

Once we copy the keys it will stored into our Clipboard.

or
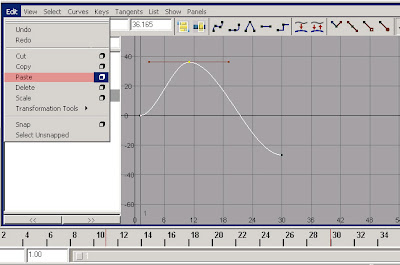


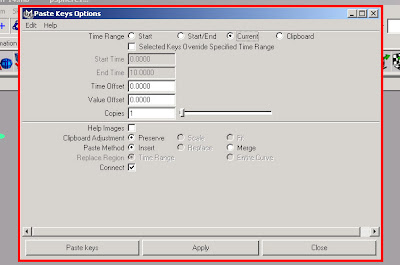
Go to 'Edit' in the Graph editor and select 'Paste' (option box)


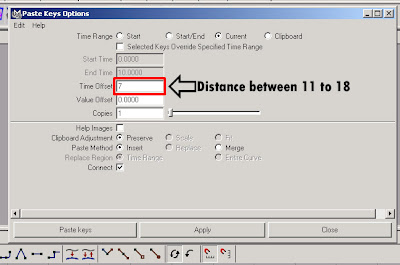
'Paste Keys Option' Window, which shows only the 'paste options'.


Time range:
  1. Start: Based on our timerange we can paste from our start time.
  2. Start/End: Start and end time
  3. Current: Our Current frame.
  4. Clipboard: From the Clipboard


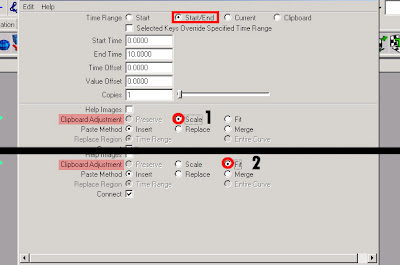
From the Start/End time notice below from the clipboard two catogeries are visible.

  • Clipboard Adjustment:
  1. Scale: It indicates that if we were to set the Start and End time the keys that we copy will fit with a scale within the range.
  2. Fit: It allows to have the keys fit within the range without any scale.


Current: Whatever current frame that we have marked.
  • Copies: We can copy and paste keys on the timeline, whatever value we have indicated in the 'Value Offset' box and 'Time Offset' box, when we increase the numbers of Copies within our paste option.


Clipboard:
  • Clipboard Adjustments:
  1. Preserve: So this allows us to preserve whatever we have within out clipboard. Its going to take the vaule and paste it right where we indicated.


Paste Method:
  • Insert: Insert our keys before, whatever we have specified in our value.
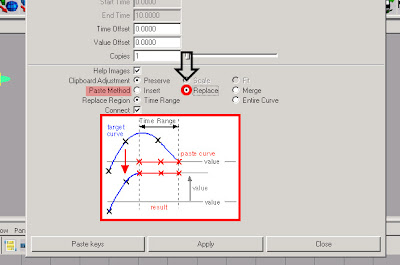
  • Replace: It takes all of those keys, lets say we had a range and any keys within that range is going to be replaced.


  • Merge: Its going to merge the keys.


We are going to use 'Replace' here, and turn off the 'Connect'.

We do need to indicate 'Time offset', 'Value offset', so we can get the swing is what we are looking for.


VERY IMPORTANT
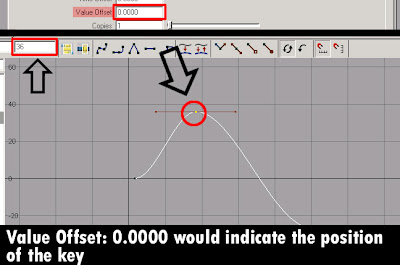
  • Time offset: We want the time offset to be offset from whatever key we have selected to copy, so here is 'Frame 11'. so '0' would indicate the position of our selected key.
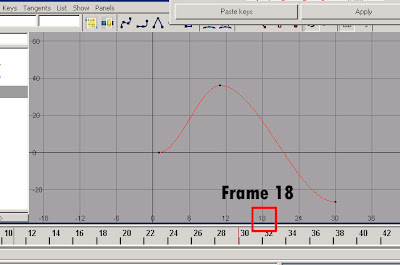


now if we wanted to paste it....Lets say Frame 18, so what time we have to put on our 'Time offset' to move the key to frame 34..?
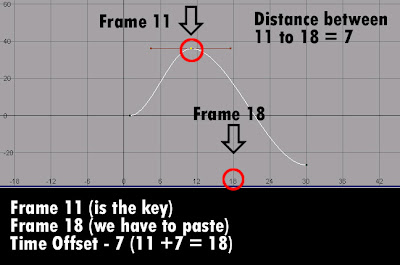


The original frame 'Frame 11'
The place we are going to paste is 'Frame 18'
The distance between 11 and 18 is 7
Time Offset is 7


Whatever value we would like the Key to be act.

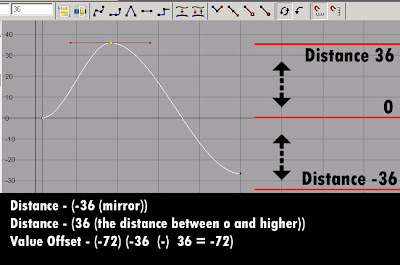
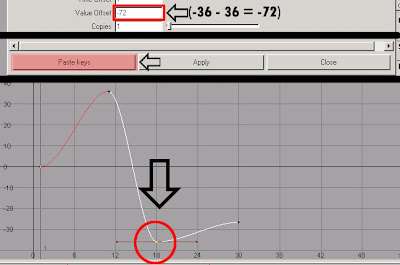
so in this case we want the Mirror Effect, right now our value is set to 36, If we want the key to have a mirror of Negative 36(-36), we would need to not only put in -36 into our window, but also we would need to put one more time to get the mirror effect.

So its basically saying if we do negative 36 once thats gonna brings us to '0', negative 36 (-36) again thats gonna bring us to the number of 36 (which is in the value box)


On the value offset.